Swarm drone light show software download,
https://www.roppor.com
For more information on “Introduction to the swarm drone software platform, ROPPOR”, you can check out the video on the YouTube channel below.
Hardware configuration for interworking with ROPPOR swarm drone software platform
2) Firmware and Parameter Setting
Let’s install the firmware used for ROPPOR Private and set the appropriate parameters.
First, you need to install Mission Planner in ArduPilot for firmware installation and hardware setup.
https://firmware.ardupilot.org/Tools/MissionPlanner/
After Dowload,
https://ardupilot.org/copter/docs/common-loading-firmware-onto-pixhawk.html#connect-autopilot-to-computer Install the firmware by referring to the document.
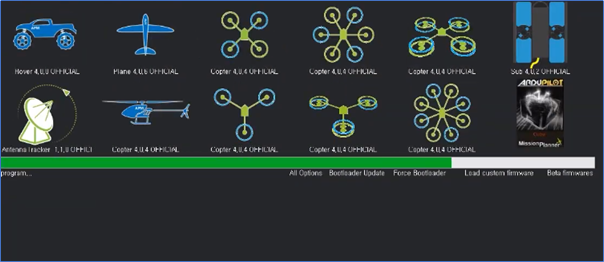
Let’s install it with Arducopter V4.0.3 Quad, the final test version specified in the ROPPOR guide.
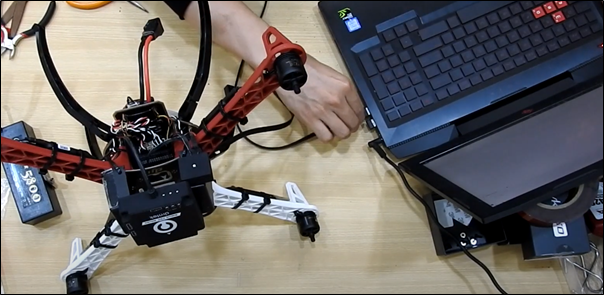
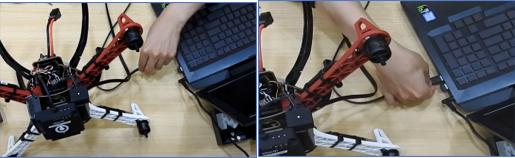
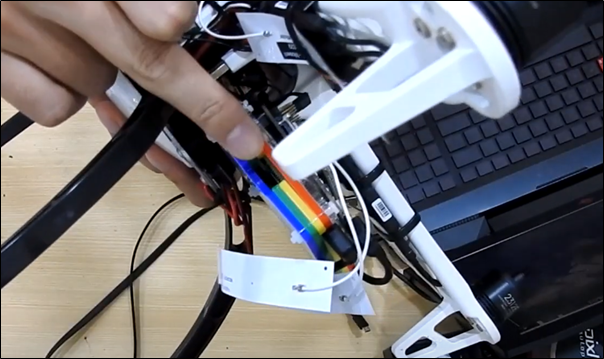
First, connect FC and PC using Micro USB.
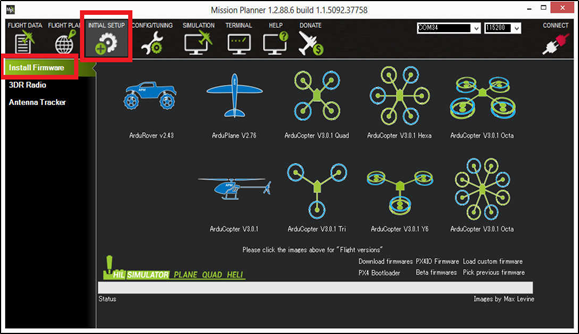
After connecting, run Mission Planner and move to [Install Firmware] in [Install Setup] in the upper tab.

Select [COM4 Legacy FMU(COM4)] on the upper right and click the firmware image to proceed with installation.
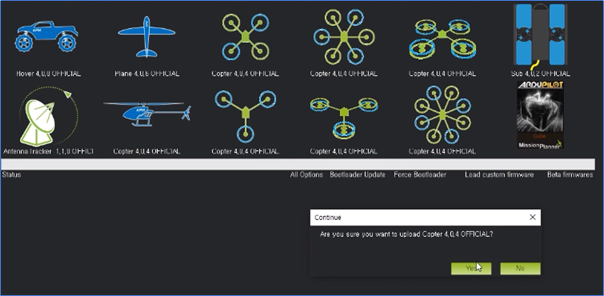
When the firmware installation is complete, follow the instructions in the guide window.
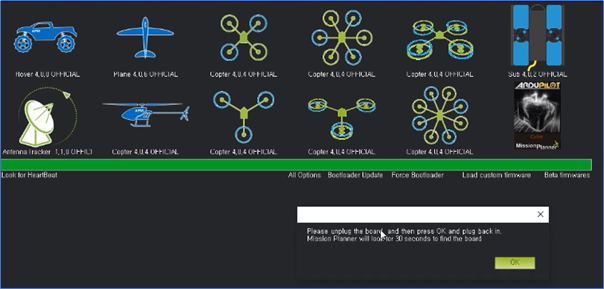
Terminate the connection between FC and PC, wait 30 seconds, and then reconnect.
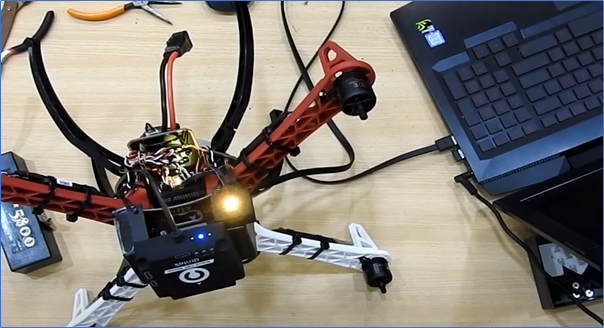
Installation proceeds automatically after connection, and FC reboots automatically when completed.
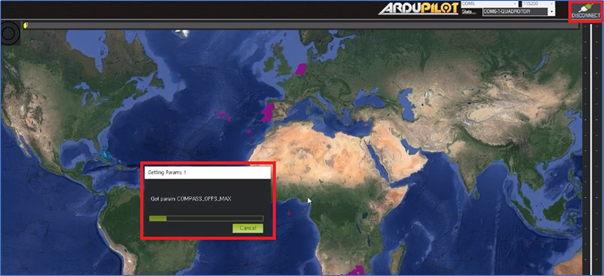
After checking the port again, click [Connect] on the upper right to connect with Mission Planner.
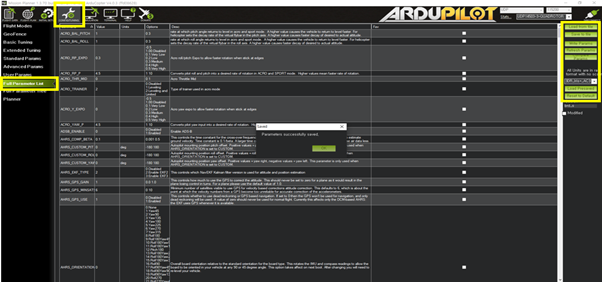
Click Config/Tuning at the top and move to the Full Parameter List.
Since RPi was connected to TELEM1 of FC earlier, search for “Tele1” or “Serial1” to find “SERIAL1_BAUD” parameter, change the value to “115” and click [Write Params] on the right to save.
If the parameter is not changed, communication between Pixhawk and Raspberri Pi will not be possible. Other parameters are Full Parameter List provided by Ardupilot: Please refer to (https://ardupilot.org/copter/docs/parameters.html) to change and operate.
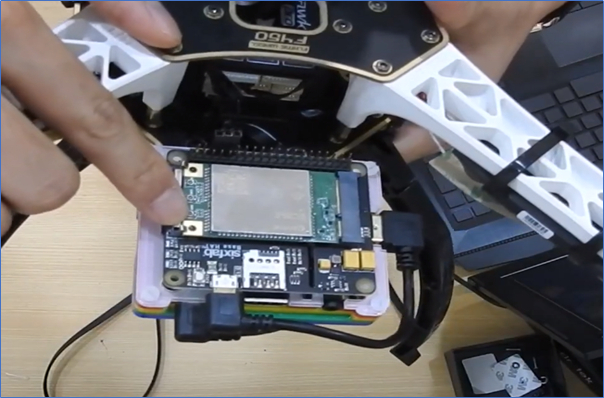
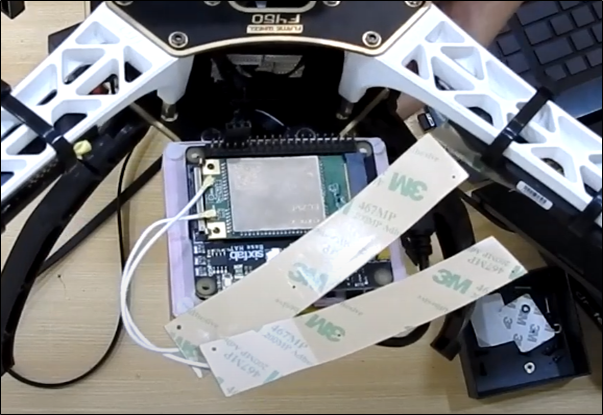
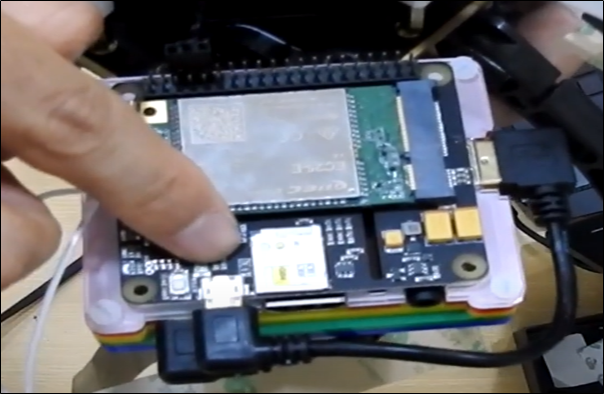
Connect LTE Antenna to LTE Module’s MAIN and DIY. And insert it into the opened USIM socket.
Similarly, insert the Micro SD Card with SDAS installed into the RPi.