Swarm drone light show software download,
https://www.roppor.com
For more information on “Introduction to the swarm drone software platform, ROPPOR”, you can check out the video on the YouTube channel below.
ROPPOR Art Swarm Drone Performance Startup Guide
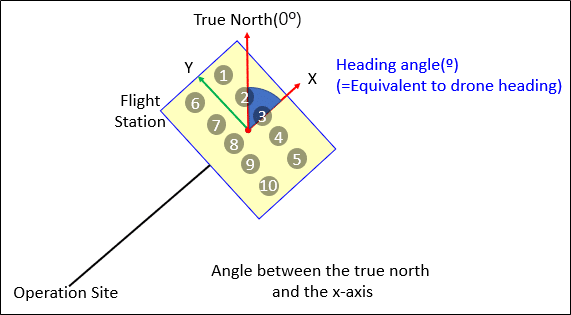
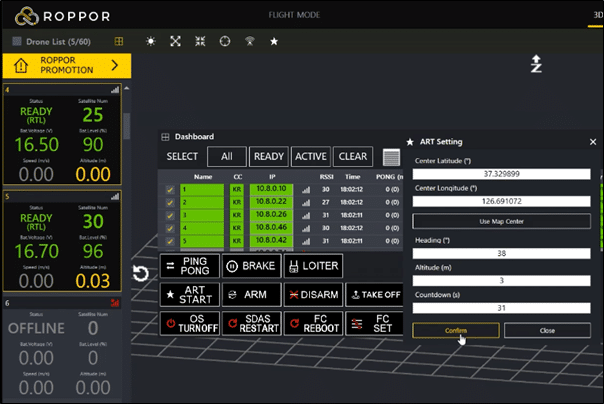
First, you need to match the direction with the aircraft actually placed in the venue through the ‘Heading’ value.
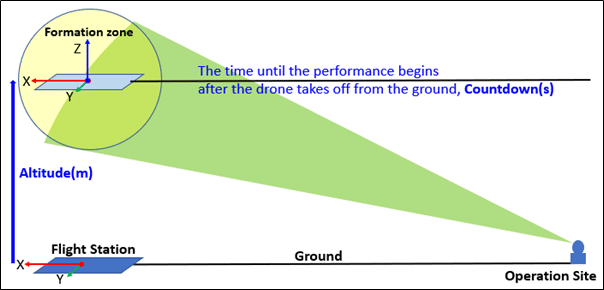
Altitude is the altitude at which the actual aircraft will take off and start performing the performance according to the created performance route file.
The Countdown sets the time from the start command to the set altitude, and then before the start of the performance.
Once you have entered the appropriate setting values, click the [Setting] button now.
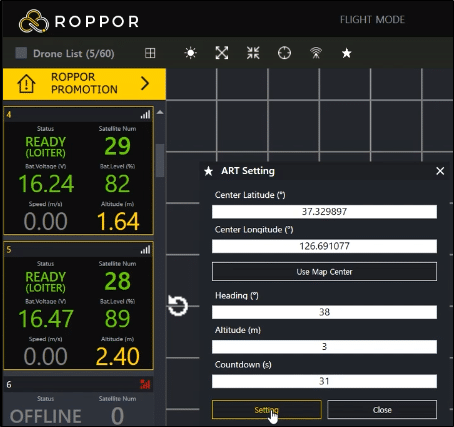
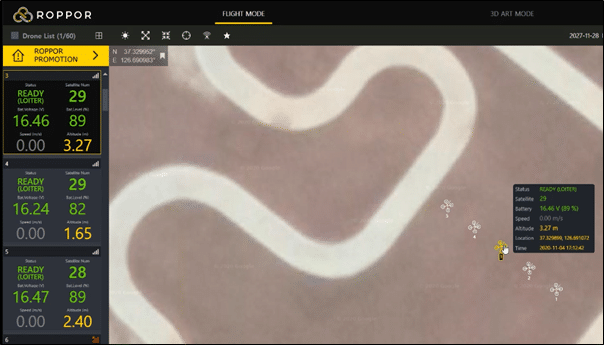
Let’s set the coordinates of the center of the performance. The center of the performance is formed when creating the performance path, and it is usually the center of the initial deployment state of the Drone at the time of the path configuration, and the sample path is also centered on the center of the 5th aircraft, No. Move to [Flight Mode], click aircraft 3, and click [Auto Tracking Icon/Map Center Point] to set the map center as the performance center map location.
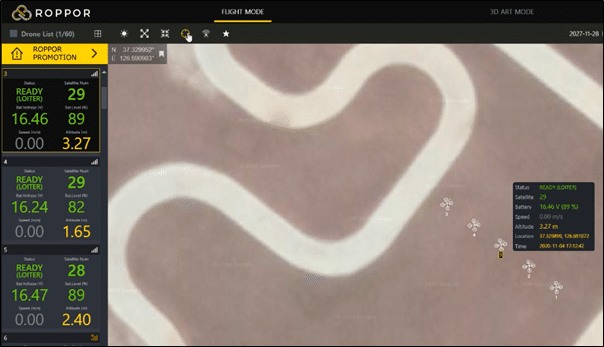
If you click [Performance Settings Icon] again and click [Use Map Center], the current map center coordinates are automatically entered. Click the [Setting] button to apply this value

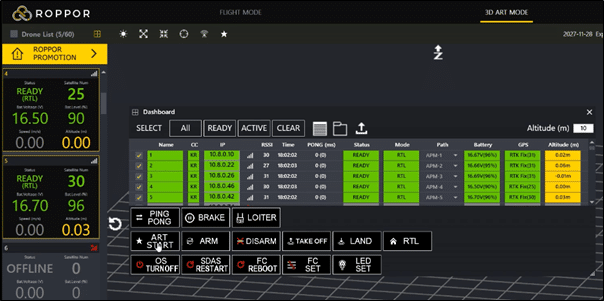
This completes the preparation process. Now, let’s fly according to the actual drone path.
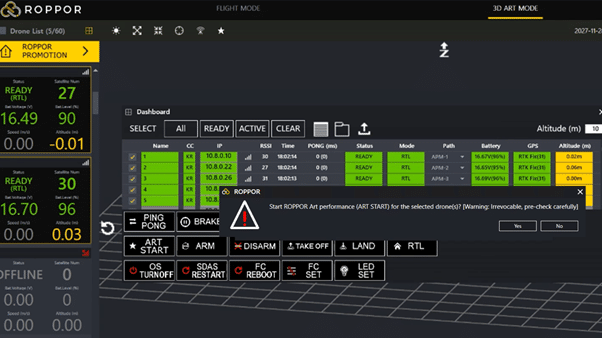
Select aircraft 1-5 on the Dashboard, and click (ART START).
After finally checking the flight settings, click [Confirm] if there are no problems with the settings.
Click [Yes] in the message box to start the performance.