Swarm drone light show software download,
https://www.roppor.com
For more information on “Introduction to the swarm drone software platform, ROPPOR”, you can check out the video on the YouTube channel below.
ROPPOR Art Swarm Drone Performance Startup Guide
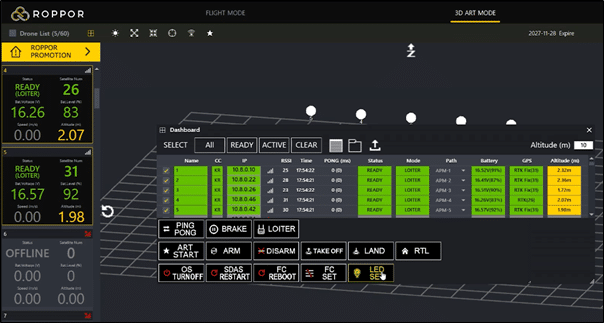
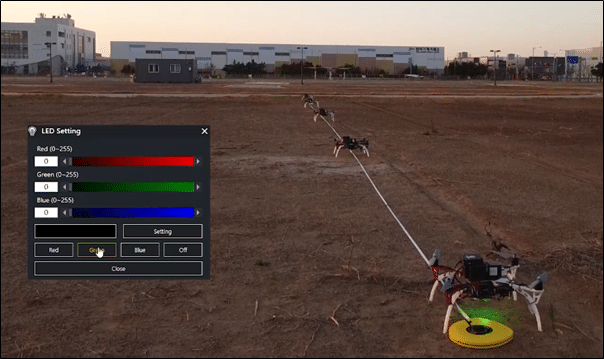
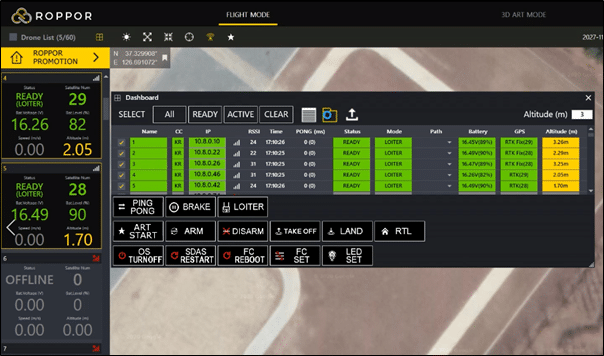
This time, let’s check the colors through the [LED SET] button to see if the LED board mounted on the drone is operating normally. After clicking the [LED SET] button, click each color in the pop-up window and check whether the color is displayed on the drone LED Board.

Now upload the path of the art performance to be used for the actual performance to the drone, and check the path in advance through simulation and check that there is no abnormality.
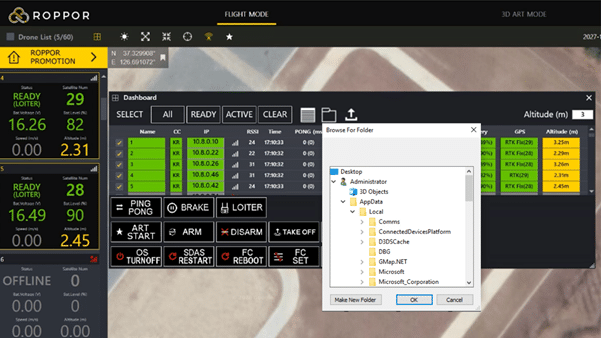
First, click on the central folder icon on the Dashboard.
When installing ROPPOR Art on the operating PC,
In the folder of’C:\Users\User Account\AppData\Local\ROPPOR\Formation\Sample’, 5 large sample performance files are installed and provided to enable verification of performance operation.
For details on the large-scale production of ROPPOR Art, you can check the video on the YouTube channel of “ROPPOR Art Drone Performance Large Production Guide Video”.
ROPPOR Art Swarm Drone Performance Large Production Guide Video (using Cinema 4D)
Select the path folder to use for the drone performance and click OK.
Make sure that the performance route for each drone has been designated and selected.

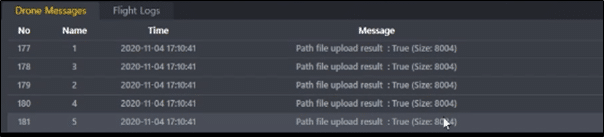
If the performance route has been correctly routed and selected, click the central upload button.

When the path is uploaded, check if the upload result and the actual file size are correct in the drone Massages window at the bottom center.
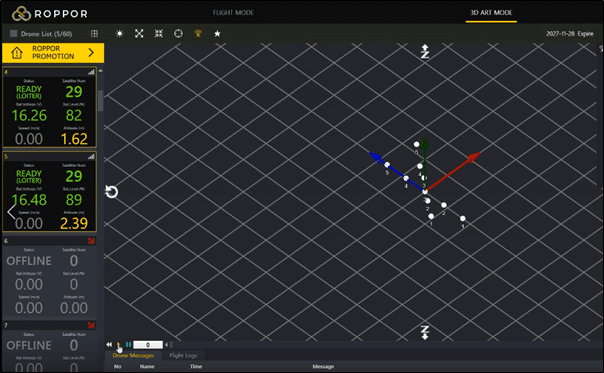
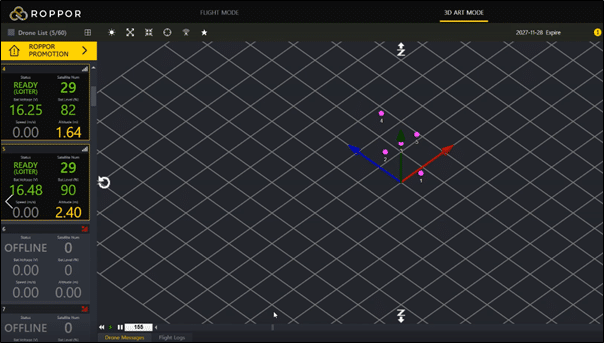
This time, we will simulate the uploaded performance path through 3D ART MODE.
Click the 3D ART MODE tab at the top of the ROPPOR software.
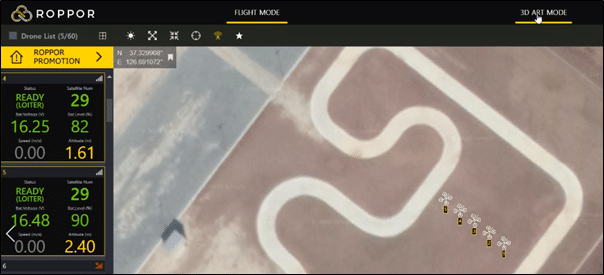
On the 3D ART MODE screen, the drones with the path file specified and the actual deployed aircraft are displayed at the same time. The full path can be easily grasped by using the
[Function Tool Bar] at the bottom of the simulation screen. Through this process, be sure to familiarize yourself with the entire path and step-by-step shape before proceeding with the performance.
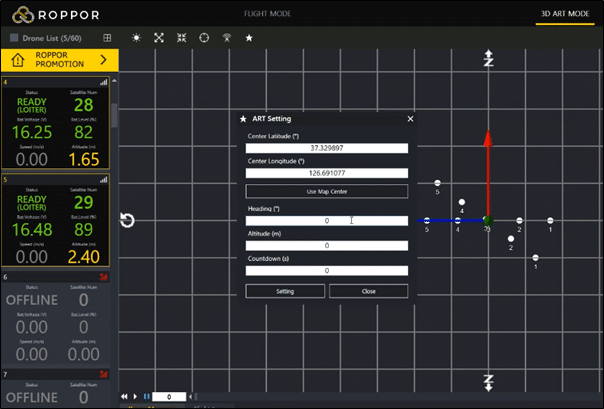
Finally, it is the stage of setting up the performance. First, click [Performance Settings Icon].